
")

Probe
One may think that measuring wall thickness is one of the easiest methods of ultrasonic testing, however, it is one of the most difficult tests to be carried out properly.
The first thing one learns as ultrasonic tester is measuring wall thickness. It is easy, but an important point is forgotten. Every tester has a step wegde calibrate on. 99.9% of these step wedges are made from sheet material. What one does not learn at the training: a probe consists of a sheath of metal and a core of plexiglass. As a result of using the probe the probe/plexiglas wears off. As a result, there may be a slit between the probe and the object to be investigate which accumulates coupling liquid.
| To the right on the picture below you'll see a new probe, on the left is a probe which has been used. The slit between the probe and the testing surface is clearly visible. |  |
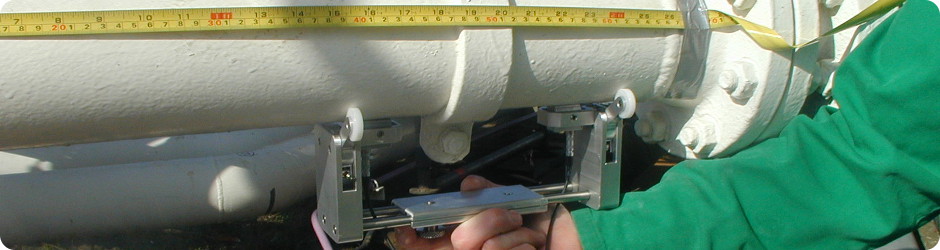
The coupling liquid has a different sound velocity than steel, and this leads to erroneous readings. Take 10 ultrasonic operators and let everyone perform the same investigation. None of the values will be the same. However, there is a simple solution to investigate properly. The common step wedges are from 2 to 20 mm thick, made of flat plate material. Our operatorshave also step wedges that are made out of pipe material.
|
Flat step wedge with worn off probe. Measured wall thickness Sa is 10,0 mm. |
 |
| Round step wedge with worn off probe, with the same settings as on the previous picture. Measured wall thickness Sa is 9,1 mm. |  |
Paint
No company likes it when the coating is removed. In order to be able to perform an accurate and correct measurement, there is a simple solution. When a sound path has been chosen which shows more than 1 back wall echo, the first echo indicates wall thickness with paint. However, if one reads the difference between the second and the first back wall echo, one gets the wall thickness of the steel only, without the paint.